July 16, 2024
In this technical note, we will explore how to develop and digitally enhance friction ridge prints on substrates with dark text on a light background (e.g. a paper document). Our goal is to optimize the clarity of friction ridge detail, leveraging the unique capabilities of the CSIpix® Light and Dark Filter. This note addresses a common challenge raised during one of our recent Customer Q&A webinars.
Understanding the Challenge
Traditionally, examiners face significant difficulties when dealing with friction ridge prints on documents featuring dark text on a light background. The text often masks crucial details of the friction ridge patterns, making it difficult to visualize and analyze the prints effectively. Without the right tools, examiners have to work with the images as they are, leading to potential missed identifications and difficulty showing/demonstrating the friction ridge detail in court.
The Unique Advantage of CSIpix®
CSIpix® offers a solution through its Light and Dark Filter, a unique feature that enhances friction ridge detail on such substrates. While similar results might be achievable in other software, the process would be highly complex and time-consuming. With CSIpix®, the enhancement process is streamlined and accessible.
Practical Application
When using the CSIpix® Light and Dark Filter, users can expect:
Enhanced Visualization: The filter significantly reduces background interference from the underlying text, making all friction ridge details more visible. In practice, this means that details previously masked by the text are now clear, potentially turning an ambiguous print into a definitive match.
Improved Communication: Enhanced images can be more easily demonstrated to non-examiners such as superiors, jury members, judges, and lawyers. This clarity not only aids in fingerprint comparison and identification but also in effectively communicating findings to others, ensuring the results are understood and accepted in various professional contexts.
The process for enhancing friction ridges deposited on text is as follows:
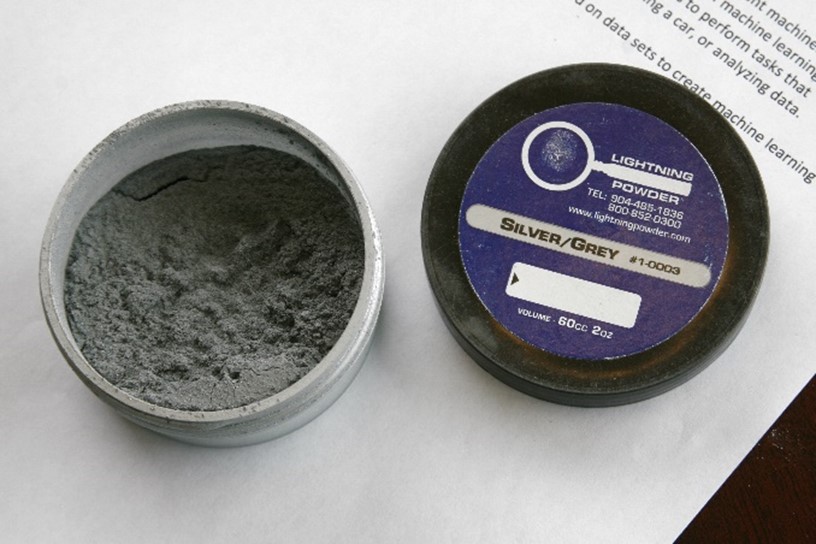
Step 1: Powder the paper using a grey powder. The best shade of grey is roughly halfway between black and white. This will ensure good contrast over both the white paper and the black text. The best powder we had in our office (and we don’t have many) was this one:
Step 2: If you have a scanner that can do this – scan the print as a tiff image with at least 1000 PPI. Alternately you can photograph the print. Include a scale in the image for calibration. Make sure the scanner or camera saves the image as a tiff, bmp or raw. You never want to deal with jpg compression artifacts, especially when a print is deposited on an interfering background.
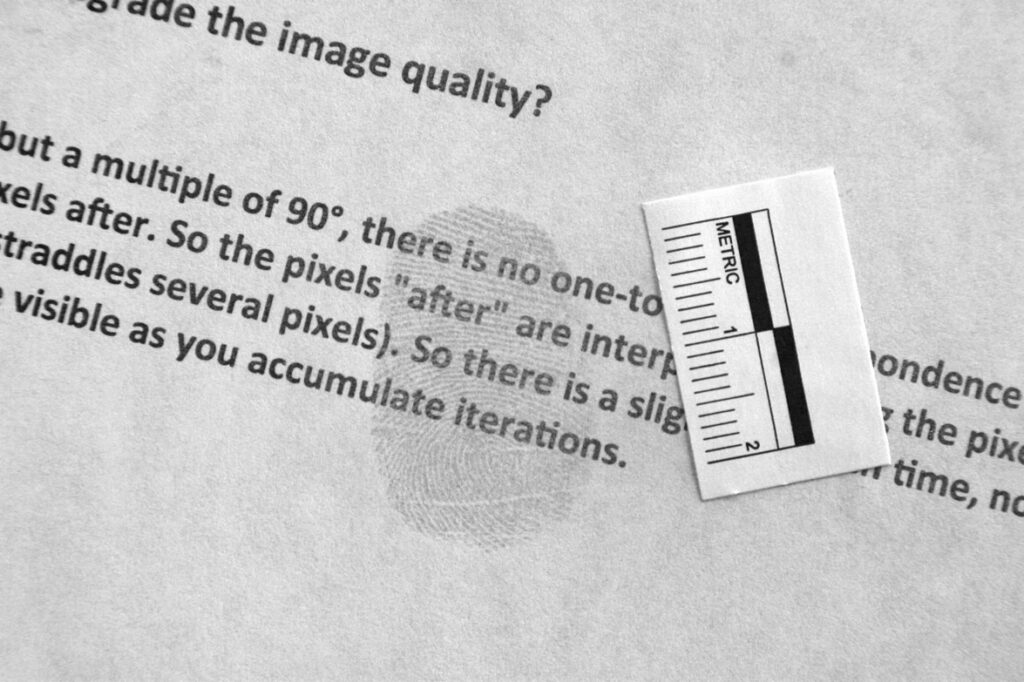
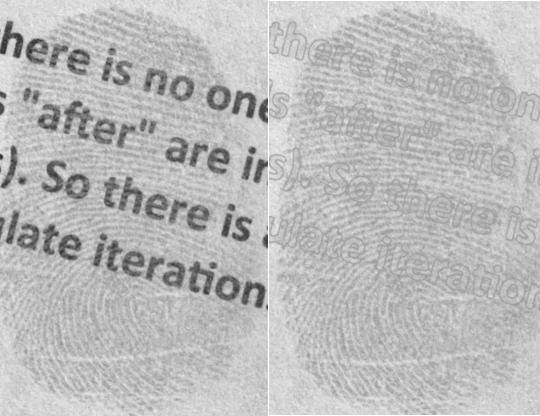
The image below shows a closeup view of the untouched 8-bit greyscale photograph. It is possible to see the ridges over the white background and the black text.

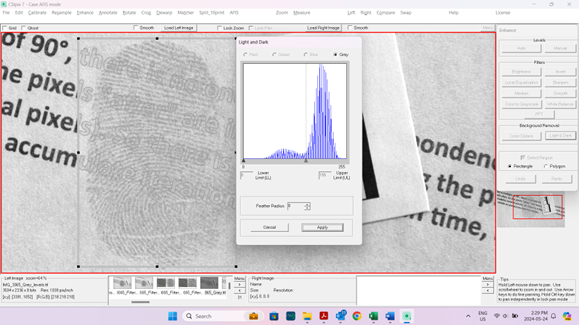
Step 3: Open the Enhance docker and click on the Light & Dark button. This will open the interface seen below. Move the Upper Limit slider to a location that lightens the darkest text while keeping the ridges as they were.
In the image below you can see the original image (left) and the final image (right):
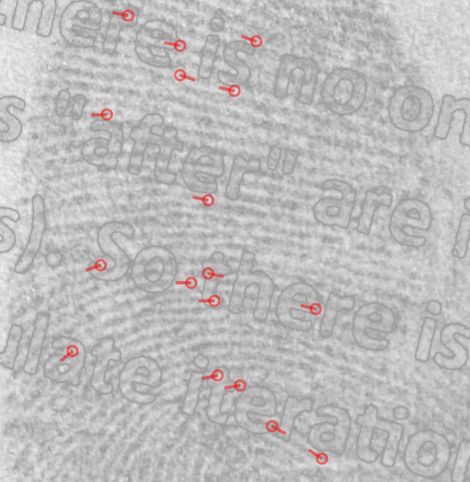
The following image shows the minutia detail that has been revealed in the regions affected by the text:
The CSIpix® Light and Dark Filter is an essential asset for examiners dealing with friction ridge prints on documents with dark text. Its ability to enhance image clarity aids in making accurate identifications and effectively communicating results to various stakeholders, ultimately strengthening the overall fingerprint analysis process.
Curious to see how it works? Check out this 2-minute video