%20(2).png)
Resolution Estimation using Fingerprint Ridges – A Step-by-Step Guide
In forensic photography, resolution is determined by the number of pixels spanning a specific, known physical distance, typically measured in pixels per inch (PPI).Ideally, a scale (ruler) is photographed alongside the evidence, allowing for the calculation of resolution by counting the pixels covering a set measurement on that ruler. If a ruler is absent in images of fingerprints, resolution can be estimated using known average friction ridge widths. According to studies by Ashbaugh and Moore, the average ridge-to-ridge distance is approximately 0.47mm for males and 0.41 mm for females.
Male average ridge-to-ridge width = 0.47 mm
Female average ridge-to-ridge width = 0.41 mm
In this guide I will assume the latent print was left by a male. The steps outlined could be repeated assuming the print was left by a female.
Ashbaugh, David R.,Quantitative-Qualitative Friction Ridge Analysis: An Introduction to Basic and Advanced Ridgeology, CRC Press, 1999 (page 64)
Moore, Raymond T., “An Analysis of Ridge-to-Ridge Distance on Fingerprints” Journal of Forensic Identification 39(4),1989 \ 231
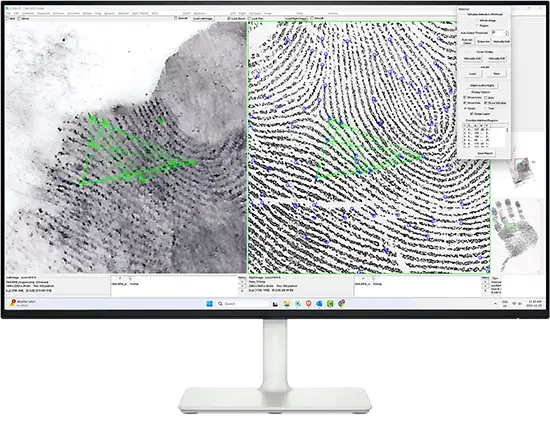
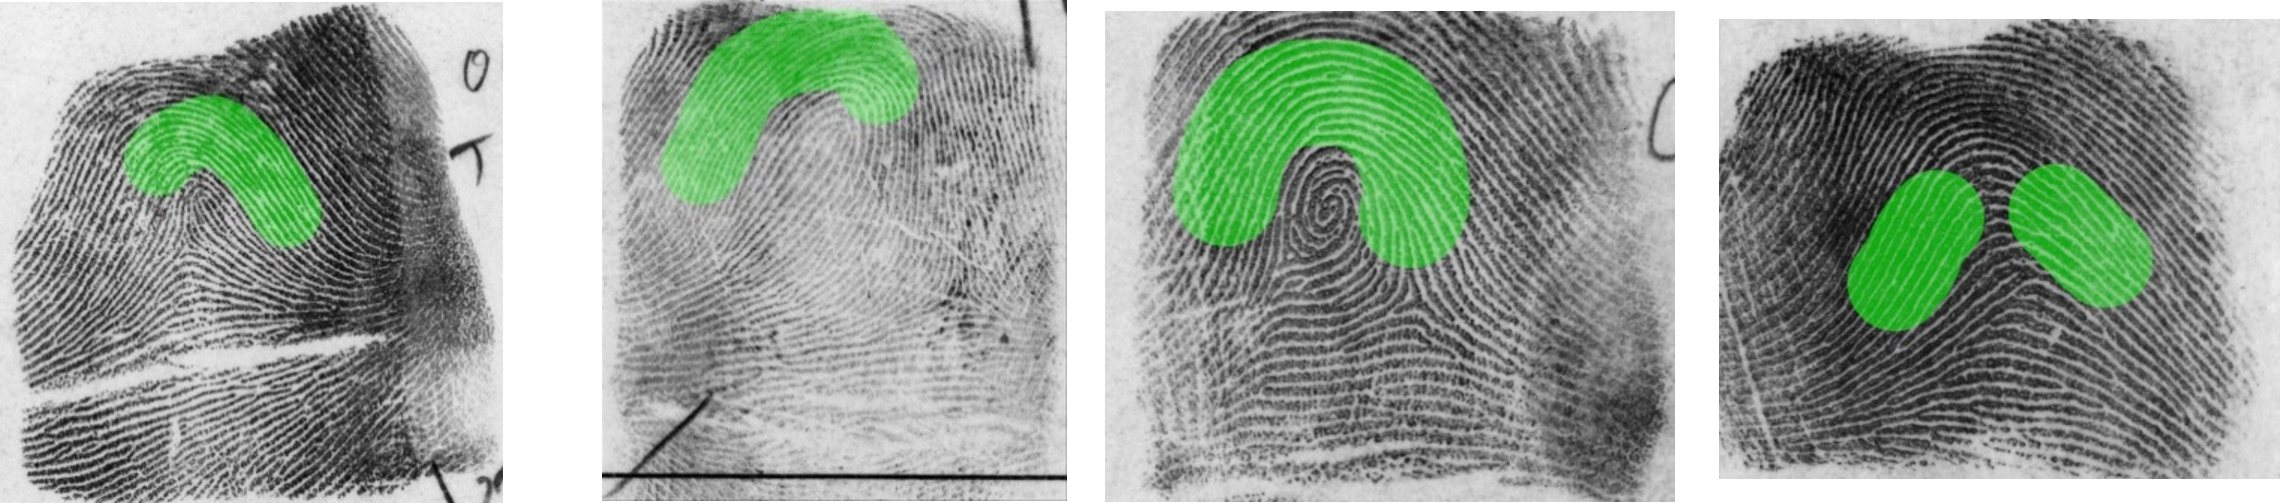
To estimate the image resolution, we recommend using the ridges within the highlighted green areas below, as research by CSIpix indicates that these areas typically feature a ridge-to-ridge spacing closest to 0.47 mm for males; for more information, please watch this video:
PPI Estimation using Finger print Images - Accuracy and Where it's Best to Make the Estimates
If the latent image is small and your options are limited, use whatever area is available. In such cases, the following AFIS search strategy will help mitigate any decrease in resolution accuracy.
Calibrating an image using ridges is very straight forward in CSIpix. Avoid bifurcations and ridge endings if possible.

Open your image and do the following
1. Click “Calibrate” on the menu bar
2. Use “Manual Calibration”
3. Draw a line across 10 ridge spacings (use fewer ridges if you must and adjust the distance accordingly)
4. Type in the distance as (10 x 0.47mm) 4.7 mm
5. Click OK and the estimated resolution will appear below the image
6. Note the resolution estimate. Let’s call this ‘Initial_PPI’.
7. Save this image. Let’s call this image “Orig_Est_Cal”.
AFIS performance can be reduced when a resolution estimate is used. As expected, performance drops off as the resolution estimate diverges from the actual resolution. The strategy outlined below was developed by CSIpix to address this issue. See the following video describing the research and the results of this strategy: CSIpix Research PPI Estimates and AFIS Accuracy
You may need up to three AFIS searches of the latent to deal with the fact that the resolution is an estimate and that the person who left the impression may have significantly wider or narrower ridge-to-ridge spacing than the average person.
AFIS Run#1
- Open the “Orig_Est_Cal” image in CSIpix
- Resample i t to the resolution required by your AFIS (usually 1000 PPI). Do this using the Resample function in CSIpix.
- You may need to crop the image if it is larger that your AFIS requires.
- If you need a scale in your image, see the PRO Tip below.
- Save the resampled (and possibly cropped) image. Let’s call it “Orig_Est_Cal_resamp_1000”.
- Run“Orig_Est_Cal_resamp_1000” through your AFIS
If you do not get a hit, it may be because the estimated resolution was too high or too low. The next two searches will deal with these possibilities.
AFIS Run#2 – Assumes the resolution was underestimated so will increase the estimate by25%
- Open“Orig_Est_Cal” image in CSIpix.
- Note the initial resolution and make the following calculation: new_PPI = Initial_PPI * 1.25
- Open the Calibration Docker and Click the ‘Type in Resolution (ppi)’ button.
- Enter the PPI value as the new_PPI above in the pix / inch box.
- Click OK. If you see a warning stating that “This function will not resample the image! Are you sure your image is new_PPIppi?”, click ‘Yes’. The new_PPIshould appear below the image.
- Save the resulting image. Let’s call it “Higher_Est_Cal”.
- Resample the image to the resolution required by your AFIS. Do this using the Resample function inCSIpix.
- You may need to crop the image if it is larger that your AFIS requires.
- If you need a scale in your image, see the PRO Tip below.
- Save the resampled (and possibly cropped) image. Let’s call it “Higher_Est_Cal_resamp_1000”.
- Run“Higher_Est_Cal_resamp_1000” through your AFIS
If you do not get a hit, it may be because the initial estimated resolution was too high. Continue with the third AFIS search.
AFIS Run#3 – Assumes the initial resolution was overestimated so will decrease theestimate by 25%
- Open“Orig_Est_Cal” image in CSIpix.
- Note the initial resolution and make the following calculation: newer_PPI = Initial_PPI * 0.75
- Open the Calibration Docker and Click the ‘Type in Resolution (ppi)’ button.
- Enter the PPI value as the newer_PPI above in the pix / inch box.
- Click OK. If you see a warning stating that “This function will not resample the image! Are you sure your image is newer_PPIppi?”, click ‘Yes’. The newer_PPIshould appear below the image.
- Save the resulting image. Let’s call it “Lower_Est_Cal”.
- Resamplethe image to the resolution required by your AFIS. Do this using the Resample function inCSIpix.
- You may need to crop the image if it is larger that your AFIS requires.
- If y ou need a scale in your image, see the PRO Tip below.
- Savethe resampled (and possibly cropped) image. Let’s call it “Lower_Est_Cal_resamp_1000”.
- Run“Lower_Est_Cal_resamp_1000” through your AFIS
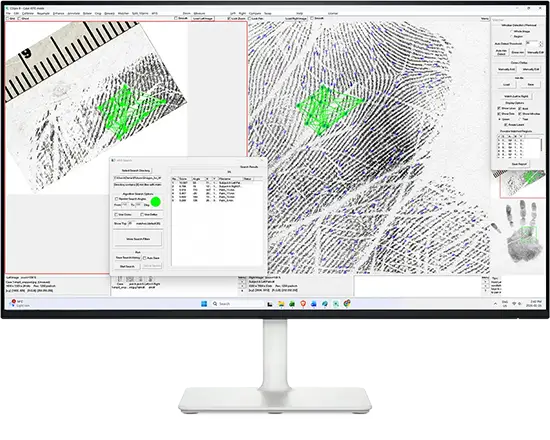
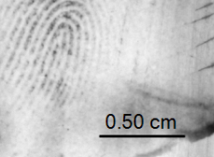
PROTip:
If your AFIS search requires a scale, you can easily create one using the Straight Line annotation. Enable ‘Show Length’ and set the line and text to black at 100% opacity for maximum visibility. Simply adjust the line length until it matches your required measurement, as shown in the example below.
Good Luck with your searches! Feelfree to reach out if you need any of this explained further.
- Patricia
Patricia LeFeuvre M. Eng., P. Eng.
President CSIpix
patricia.lefeuvre@csipix.com

CSIpix Webinars & Updates